It’s time to break out the floral projects and get ready for a new season. Adding new colors to your home decor can be just the thing you need to shake off the winter blues. Grab some silk flowers and your trusty Surebonder glue gun and get started on your DIY floral arrangements.
Things you need:
- Ribbon
- Silk flowers
- Long nose pliers
- Wire cutter
- Floral tape
- Surebonder dual temp hot glue gun
- Surebonder clear glue sticks
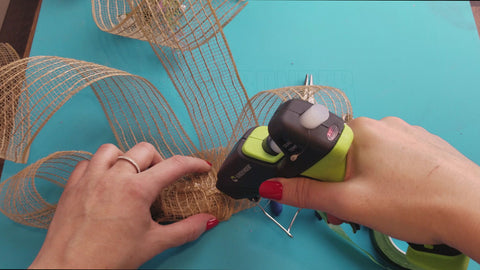
The first step in this craft project is creating the bow for your floral swag. We chose our DT-360F Dual Temperature Glue Gun for this project. The ribbon we used is burlap, which can melt easily with enough hot glue. We used just enough glue to hold a few points together. For delicate ribbons, we suggest using your glue gun on a low temperature setting to prevent damage.
This swag design was inspired by fields of lavender, so we tied our bow loosely to give it a relaxed, rustic feel. We also kept the bow tails long so they match the length of the swag. Once your bow is ready, set it aside.
Grab your silk flowers and arrange them in a way that looks balanced and appealing. We used a larger lavender stem as the base and glued additional flowers onto it. Use your wire cutters to trim any stems that are too long. When you’re happy with your arrangement, choose a point at the base where you can add a small amount of hot glue to hold everything together. Make sure the glue has cooled before moving on to the next step.
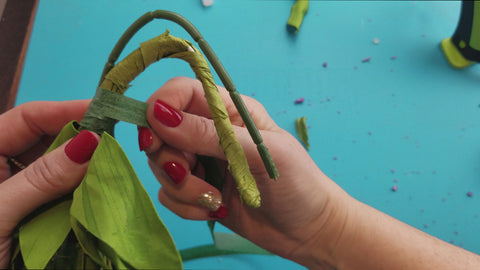
Above the glued area, begin bending the stems together to create a loop. This will form the top of your floral swag. Bending the stems before applying floral tape helps the tape wrap tightly and securely. Once your loop is shaped, tape it together at the end to close it.
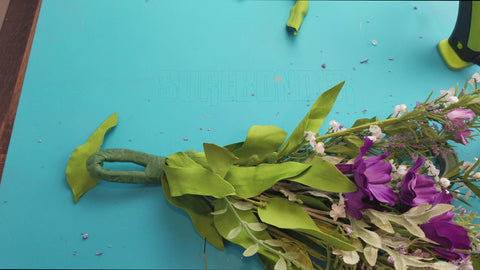
Next, take the bow you made earlier and glue it to the bottom of the loop. Allow it to cool completely.
In no time, you’ll have a beautiful new piece of DIY home decor. Have any questions or comments? Add them below — we’d love to hear from you! Stay tuned for more craft inspiration coming soon.