We all have those days where we’d love to turn into a mermaid so the stress of life could melt away while we bask in the shimmer of a sparkling tail and sea salt hair. This glittery mermaid clutch is a fun way to bring a little of that magic to life.
Things You Need:
- 3–6 colored glitter fabric sheets
- X-Acto knife
- Scissors
- Surebonder Fabric Stiks
- Surebonder Dual Temp Glue Gun
- All-purpose craft material (found at your local craft store)
- Mini ceramic flower pot (optional)
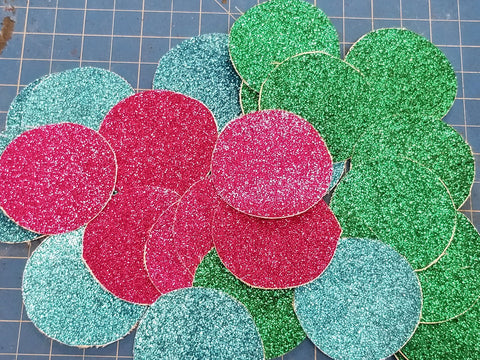
This clutch project is a bit detailed, but worth it! Start by flipping your glitter fabric sheets over. We used a mini ceramic flower pot as a circle guide, but anything with a similar shape will work. Place it upside down on the fabric and cut around the edge with your X-Acto knife. You may need to go around it more than once depending on your blade sharpness. Save any leftover pieces—we’ll use them later to strengthen the flap.

Repeat this step on all of your glitter fabric sheets until you have a pile of circles. Then cut each circle in half to create your mermaid scales.
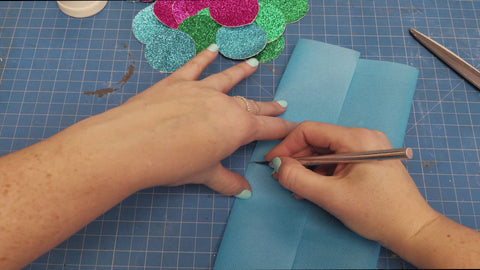
Now take your all-purpose craft material and fold it into the shape you want for your clutch. We made a mini clutch, so we trimmed ours to size. Note that this type of material is delicate—your glue gun tip can melt through it even on a low temperature. Apply fabric glue to the edges (keeping glue away from the rest of the surface) and glue the sides together to form the pouch.
Next, decide the pattern of your scales—how many you want across and how you want them arranged. There’s no perfect order here; every mermaid has a unique scale pattern!
 When you’re ready, glue the straight edge of each scale to the bag, leaving the rounded side unglued. This lets you overlap them and gives the finished clutch a fun 3D effect. We started on the left and worked our way across.

Glue your scales up the first row, moving upward. Mistakes are easy to hide—just cover them with another scale.
When starting the second row, be sure to tuck the left corners of the scales under the row above. This creates the overlapping “fish scale” look.
Continue until the entire front is covered, then flip the pouch and repeat on the back. Try to line up the scales on the back with the front for a seamless pattern.
The flap of the clutch is the tricky part. You want the scales to look fluid while still keeping the flap tight enough to stay closed. Start at the bottom of the flap and layer the scales upward, matching them with the row below.

You’ll notice a gap between the back of the clutch and the flap—this is normal. Take a strip of your leftover glitter fabric, slightly wider than the gap, and glue it inside. Work a fold into it to reinforce the area. This helps the clutch stay closed.

Next, cut a larger piece to fold over the front of the flap and glue it in place. Continue working the fold until it feels solid. Then glue a straight line of scales across the top to clean up the front edge. If any scales stick up, glue them flat. We only needed to glue two layers flat, but adjust based on your clutch.

And that’s it! We hope you had a swimmingly good time making this mermaid-inspired clutch. Check back with us soon—we have more glue gun craft ideas on the way!
Tips:
- Use your X-Acto knife to reach tight spots that need glue.
- Carefully trim away any small glue strands.
- Trim scales with scissors for a cleaner finish.
- Your clutch will fit small items like money, lipstick, or a couple essentials.
- Don’t worry about perfection—every mermaid has a unique scale pattern! Make this project your own.